How to Replace Cantilever on a Stylus: A Step-by-Step Guide
If you’re an audiophile, you know how important it is to have a quality stylus for your turntable. However, over time, even the best stylus can become worn out, resulting in degraded sound quality. When this happens, you have two choices: replace the entire cartridge or replace just the stylus with a new cantilever. In this article, we’ll show you how to replace the cantilever on your stylus, step-by-step. Follow these instructions to get your turntable sounding its best again.
What is a Stylus and Cantilever?

Before we dive into the replacement process, let’s take a moment to define what a stylus and cantilever are and how they work together to produce sound from your turntable.
Stylus
The stylus, also known as the needle, is the small, pointed piece at the end of the cantilever that makes contact with the record’s grooves and reads the audio information encoded there. When the stylus moves back and forth and up and down with the record grooves, it creates an electrical signal.
Cantilever
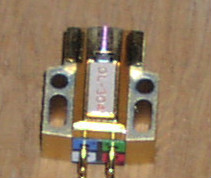
The cantilever is the thin tube that extends from the cartridge and supports the stylus. It is often made of aluminum or boron and is designed to be lightweight and rigid.
When to Replace Your Stylus Cantilever

There are a few signs that it’s time to replace your stylus cantilever:
Degraded Sound Quality
If you notice that your records are sounding “off” or distorted, it may be because the stylus is damaged or worn out. Replacing the stylus cantilever can help restore the sound quality.
Visible Damage to the Cantilever
If you can see visible damage to the cantilever, such as cracks or breaks, it’s time to replace it. In some cases, you may be able to see this damage with the naked eye. In other cases, you may need a magnifying glass or microscope to spot the issue.
Excessive Wear
If you’re an avid vinyl collector who listens to records frequently, you may notice that your stylus cantilever is becoming worn down over time. This can be especially true if you’re playing records that aren’t in perfect condition or are older.
Replacing the Cantilever on a Stylus

Now that you know why you may need to replace your stylus cantilever, let’s dive into the replacement process. Here’s how to replace the cantilever on a stylus:
Step 1: Remove the Old Stylus Cantilever
To remove the old stylus cantilever, grip the stylus with a pair of tweezers or pliers as close to the cantilever as possible. Be careful not to damage the cantilever or the stylus tip.
Step 2: Clean the Cartridge
Before inserting the new cantilever, make sure the cartridge is clean and free of dust and debris. Use a small brush to gently clean the cartridge and remove any dirt.
Step 3: Prepare the New Cantilever
If your new cantilever hasn’t been pre-mounted, you’ll need to prepare it by attaching it to the cartridge’s mounting plate. This process may vary depending on the cartridge type, so be sure to consult the manufacturer’s instructions.
Step 4: Attach the New Stylus Cantilever
Slowly and carefully attach the new stylus cantilever to the cartridge. Make sure it’s secure and properly aligned with the cartridge’s mounting plate.
Step 5: Test the Stylus
Once the new stylus cantilever is in place, test the stylus by playing a record. Listen for any issues or sound quality problems.
Step 6: Enjoy Your New Stylus!
If everything sounds good, congratulations! You’ve successfully replaced the cantilever on your stylus and can now enjoy your turntable’s improved sound quality.
Conclusion

Learning how to replace a stylus cantilever can help you extend the life of your turntable’s cartridges and keep your sound quality at its best. Remember to be careful and take your time when replacing the cantilever, and always consult the manufacturer’s instructions for your specific cartridge type. By following these steps, you’ll be able to enjoy your vinyl collection for years to come.
FAQs

1. How often do I need to replace my stylus cantilever?
It depends on how often you use your turntable and the condition of your records. On average, a stylus cantilever should last between 500-1000 playing hours. However, if you notice a decline in sound quality, you may need to replace it sooner.
2. Can I replace just the stylus instead of the entire cartridge?
Yes, in most cases you can replace just the stylus cantilever instead of the entire cartridge. This is a more cost-effective solution and can help you extend the life of your cartridge.
3. How do I know if my stylus cantilever is damaged?
You may notice a decline in sound quality, visible cracks or breaks in the cantilever, or excessive wear over time. If you’re unsure, consult a professional technician or manufacturer for advice.
4. Can I replace my stylus cantilever myself?
Yes, it’s possible to replace the stylus cantilever yourself. However, it requires careful attention to detail and some technical knowledge. If you’re unsure, it’s best to consult a professional technician or manufacturer for advice.
5. What type of cantilever should I choose?
The type of cantilever you choose may depend on your specific cartridge type and your sound preferences. Aluminum and boron cantilevers are popular choices, but more exotic materials like ruby and diamond may offer superior sound quality. Consult the manufacturer’s recommendations for your specific cartridge type.


