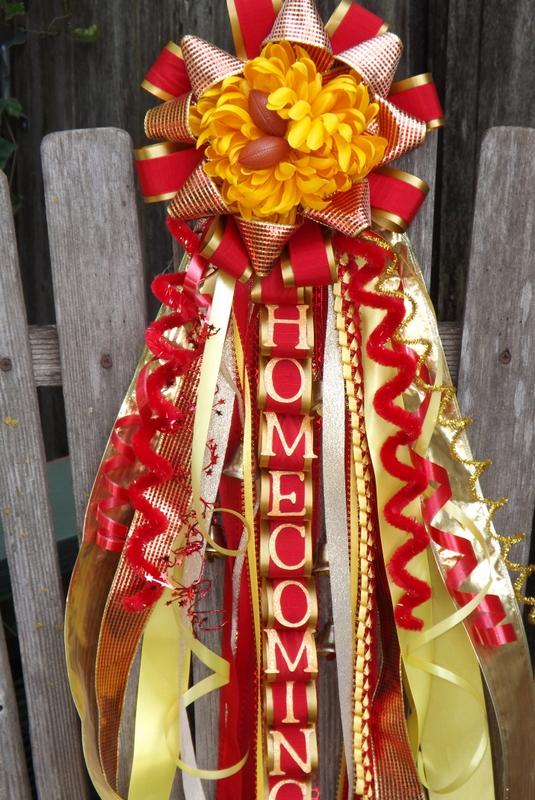
How to Make a Homecoming Garter: A Step-by-Step Guide
Homecoming garters have become a staple of high school culture, particularly in the South. These days, everyone seems to wear them, not just couples! Purchasing a garter can be expensive, but with a little creativity and DIY spirit, you can make your own unique version at a fraction of the cost. In this guide, we’ll walk you through the steps of making your very own homecoming garter!
What You Will Need
| Material | Quantity |
|---|---|
| Cardstock | 4 pieces (4-inch diameter) |
| Compass | 1 |
| Scissors | 1 pair |
| Ruler | 1 |
| Stapler | 1 |
| Hot glue gun | 1 |
| Ribbon (1-1/2-inch-wide and 1-inch wide) in school colors | 3-1/4 yards each for loops in steps 2 and 8 |
| Ribbon (1-1/2-inch-wide) in a school color | 1-1/3 yard for points in step 3 |
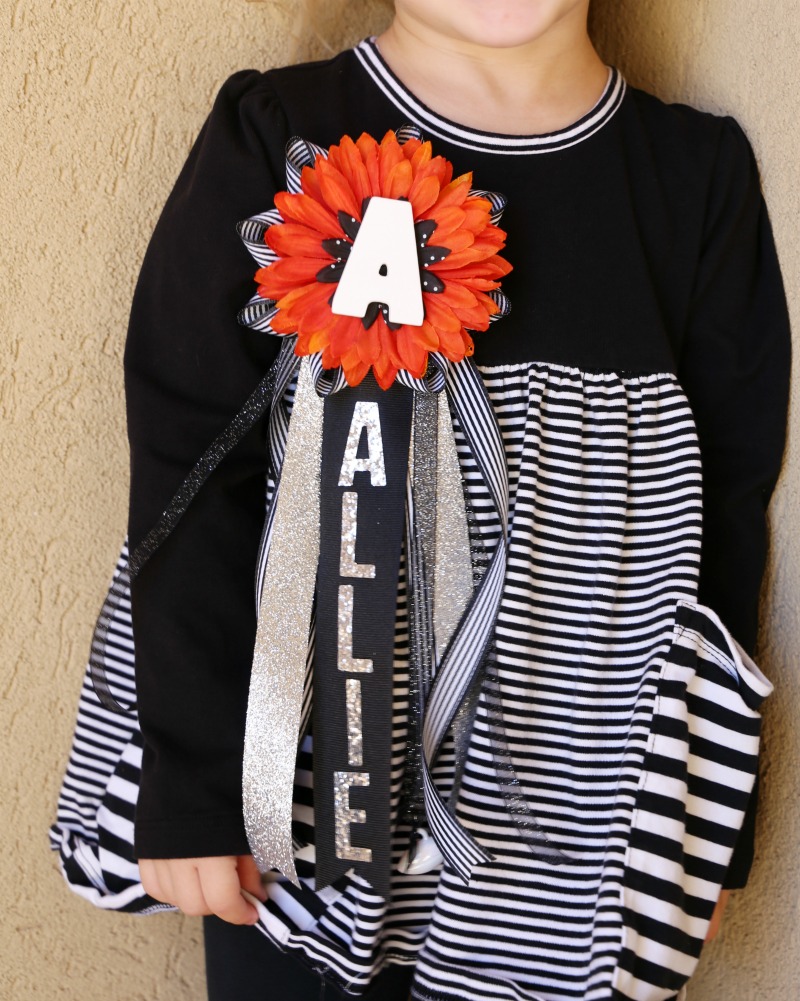
| Four-inch ball mum | 1 (white or school color) |
| Pipe cleaner | 1 |
| Bead (with hole large enough to thread onto a pipe cleaner) | 1 |
| Metallic honeycomb ribbon (also known as punchinello ribbon) – 2-inch-wide | 1/2 yard |
| Letter stickers (1-1/2-inch) | As needed to spell out desired message |
| Ribbon (assorted in school colors) for base ribbon streamers | Approximately 10 yards |
| Assorted ribbon (in school colors and coordinating metallics) for trims | Approximately 10 yards |
| Bells (one-inch cone bells were used in the example) | 3-4 |
| Garter | 1 |
| Trinkets | As desired |
Step-by-Step Instructions

Step 1: Make the Backers
Begin by cutting four 4-inch diameter circles from cardstock or lightweight cardboard.
Step 2: Make the Loops
Cut eight 6-inch lengths from both the 1-1/2-inch-wide and 1-inch-wide ribbon in your school’s colors. Center one thin ribbon on top of one wide ribbon. Fold them in half with short ends together. Do not crease the fold, and staple the short ends together. Repeat with the remaining ribbon to create eight loops.
Step 3: Make the Points
Cut eight 6-inch lengths from 1-1/2-inch-wide ribbon in your school’s colors. Hold the length of one ribbon horizontal with the back facing you. Bring the short ends together, rotating and crossing the ends with the right sides facing you to form a point. Staple the crossed ends together, and repeat with the remaining ribbon to create eight points.
Step 4: Finish the Top Backer
Evenly space the loops around the edge of one backer circle and staple to secure. Overlap and position the points between the loops, and staple to secure. This is your top backer with loops and points.
Step 5: Prepare Your Flower
Remove the stem from the four-inch ball mum by pulling the stem out of the bottom of the flower. Thread a bead onto the end of a chenille pipe cleaner. Bend one inch of the pipe cleaner over the bead and twist it around the longer length. Insert the pipe cleaner through the center hole of the flower, from the front to the back. Pull until the bead is securely embedded inside the petals of the flower. The bead will keep the pipe cleaner from coming loose and prevent the petals of the flower from coming apart.
Step 6: Attach the Flower
Pierce a small hole through the center of the top backer using the tip of scissors, a pencil, or a wooden skewer. Apply hot glue to the front of the backer. Insert the stem of the pipe cleaner through the hole on the front of the backer and pull until the mum is sitting in the glue. Allow the glue to cool.
Step 7: Attach Base Ribbon Streamers
Cut 18- to 24-inch lengths from assorted ribbon in your school’s colors. Approximately 15 ribbons make a nice, full base, but you can attach as many as you like. Arrange as desired and staple one end of each along a five-inch length of ribbon. Place a dot of hot glue on the unattached end of each ribbon and attach intermittently around the backer, about an inch in from the edge.
Step 8: Add the Loops
Cut an 18-inch length of ribbon. Attach one end to the backer a few inches to the left of the flower, and the other end a few inches to the right. Cut three 10-inch lengths of each of the two ribbons used for the loops. Center each of the six loop pieces onto the overhanging ribbon. Fold the ribbon in half at each loop and staple the folded end. Finally, affix them intermittently around the backer with hot glue; the loops should be suspended about two-thirds of the way down from the top of the backer.
Step 9: Embellish Your Garter
Now comes the fun part where you can let your creativity shine! You can add embellishments of your choice, such as letter stickers, trinkets, metal accents, and anything else that fits your personal style. Use hot glue to adhere these items onto your garter.
Conclusion
Now that you’ve completed your very


